The Nirikomi Project

The Journey to Nirikomi: A Wild Exploration of Clay Recycling and Handbuilding
Oh boy, okay—this one kind of morphed into something way bigger than I expected, but I’ll do my best to take you through my very wild stream of consciousness that led me to a Japanese handbuilding technique called Nirikomi.
Phase 1: The Great Clay Recycling Project
It all started with a simple observation: our pottery studio was wasting tons of clay. If you didn’t know, clay is basically infinitely recyclable—as long as you keep all the original components together.
For example, if you throw a lot of clay, you keep the water (which contains all the fine particles), and you keep your trimmings (which lost some of their original integrity). Put them back together, and voilà—you’ve got a refreshed clay body. There are detailed YouTube videos on this, but the gist is: I saw a problem, and I wanted to fix it.
So, I started with abandoned clay—hard lumps left behind by students or members who had moved on. These were mostly pure clay types that just needed rehydration. Then, people started donating trim scraps, slop buckets, broken pots, and every other bit of clay waste. Suddenly, I had so much clay that I didn’t know what to do with it all.
I tried blending and rehydrating the mix, keeping different clays in separate bags until it became overwhelming. That’s when I hit a roadblock—recycling was a massive undertaking, and I needed a creative way to actually use all this clay.
Phase 2: Discovering Nirikomi
After making some mini test batches and experimenting with marbling (check my shop for the marbled section), I thought: What if I made intentional patterns with all these different clays?
That’s when I stumbled upon Nirikomi, a Japanese pottery technique typically done with tinted porcelain. You mix mason stains into the clay to achieve cool layered patterns. But instead of staining porcelain, I had a ton of naturally varied clay colors, so I figured—why not try it with what I had?
I started with some small plates and a cup, using two clays to create an organic, wabi-sabi look. Then I made a big bowl, which I love. Heather called it “high-end fashion pottery,” and honestly, it totally has that couture feel—wonky, but in a beautifully intentional way.
The Nirikomi Process (How I Did It)
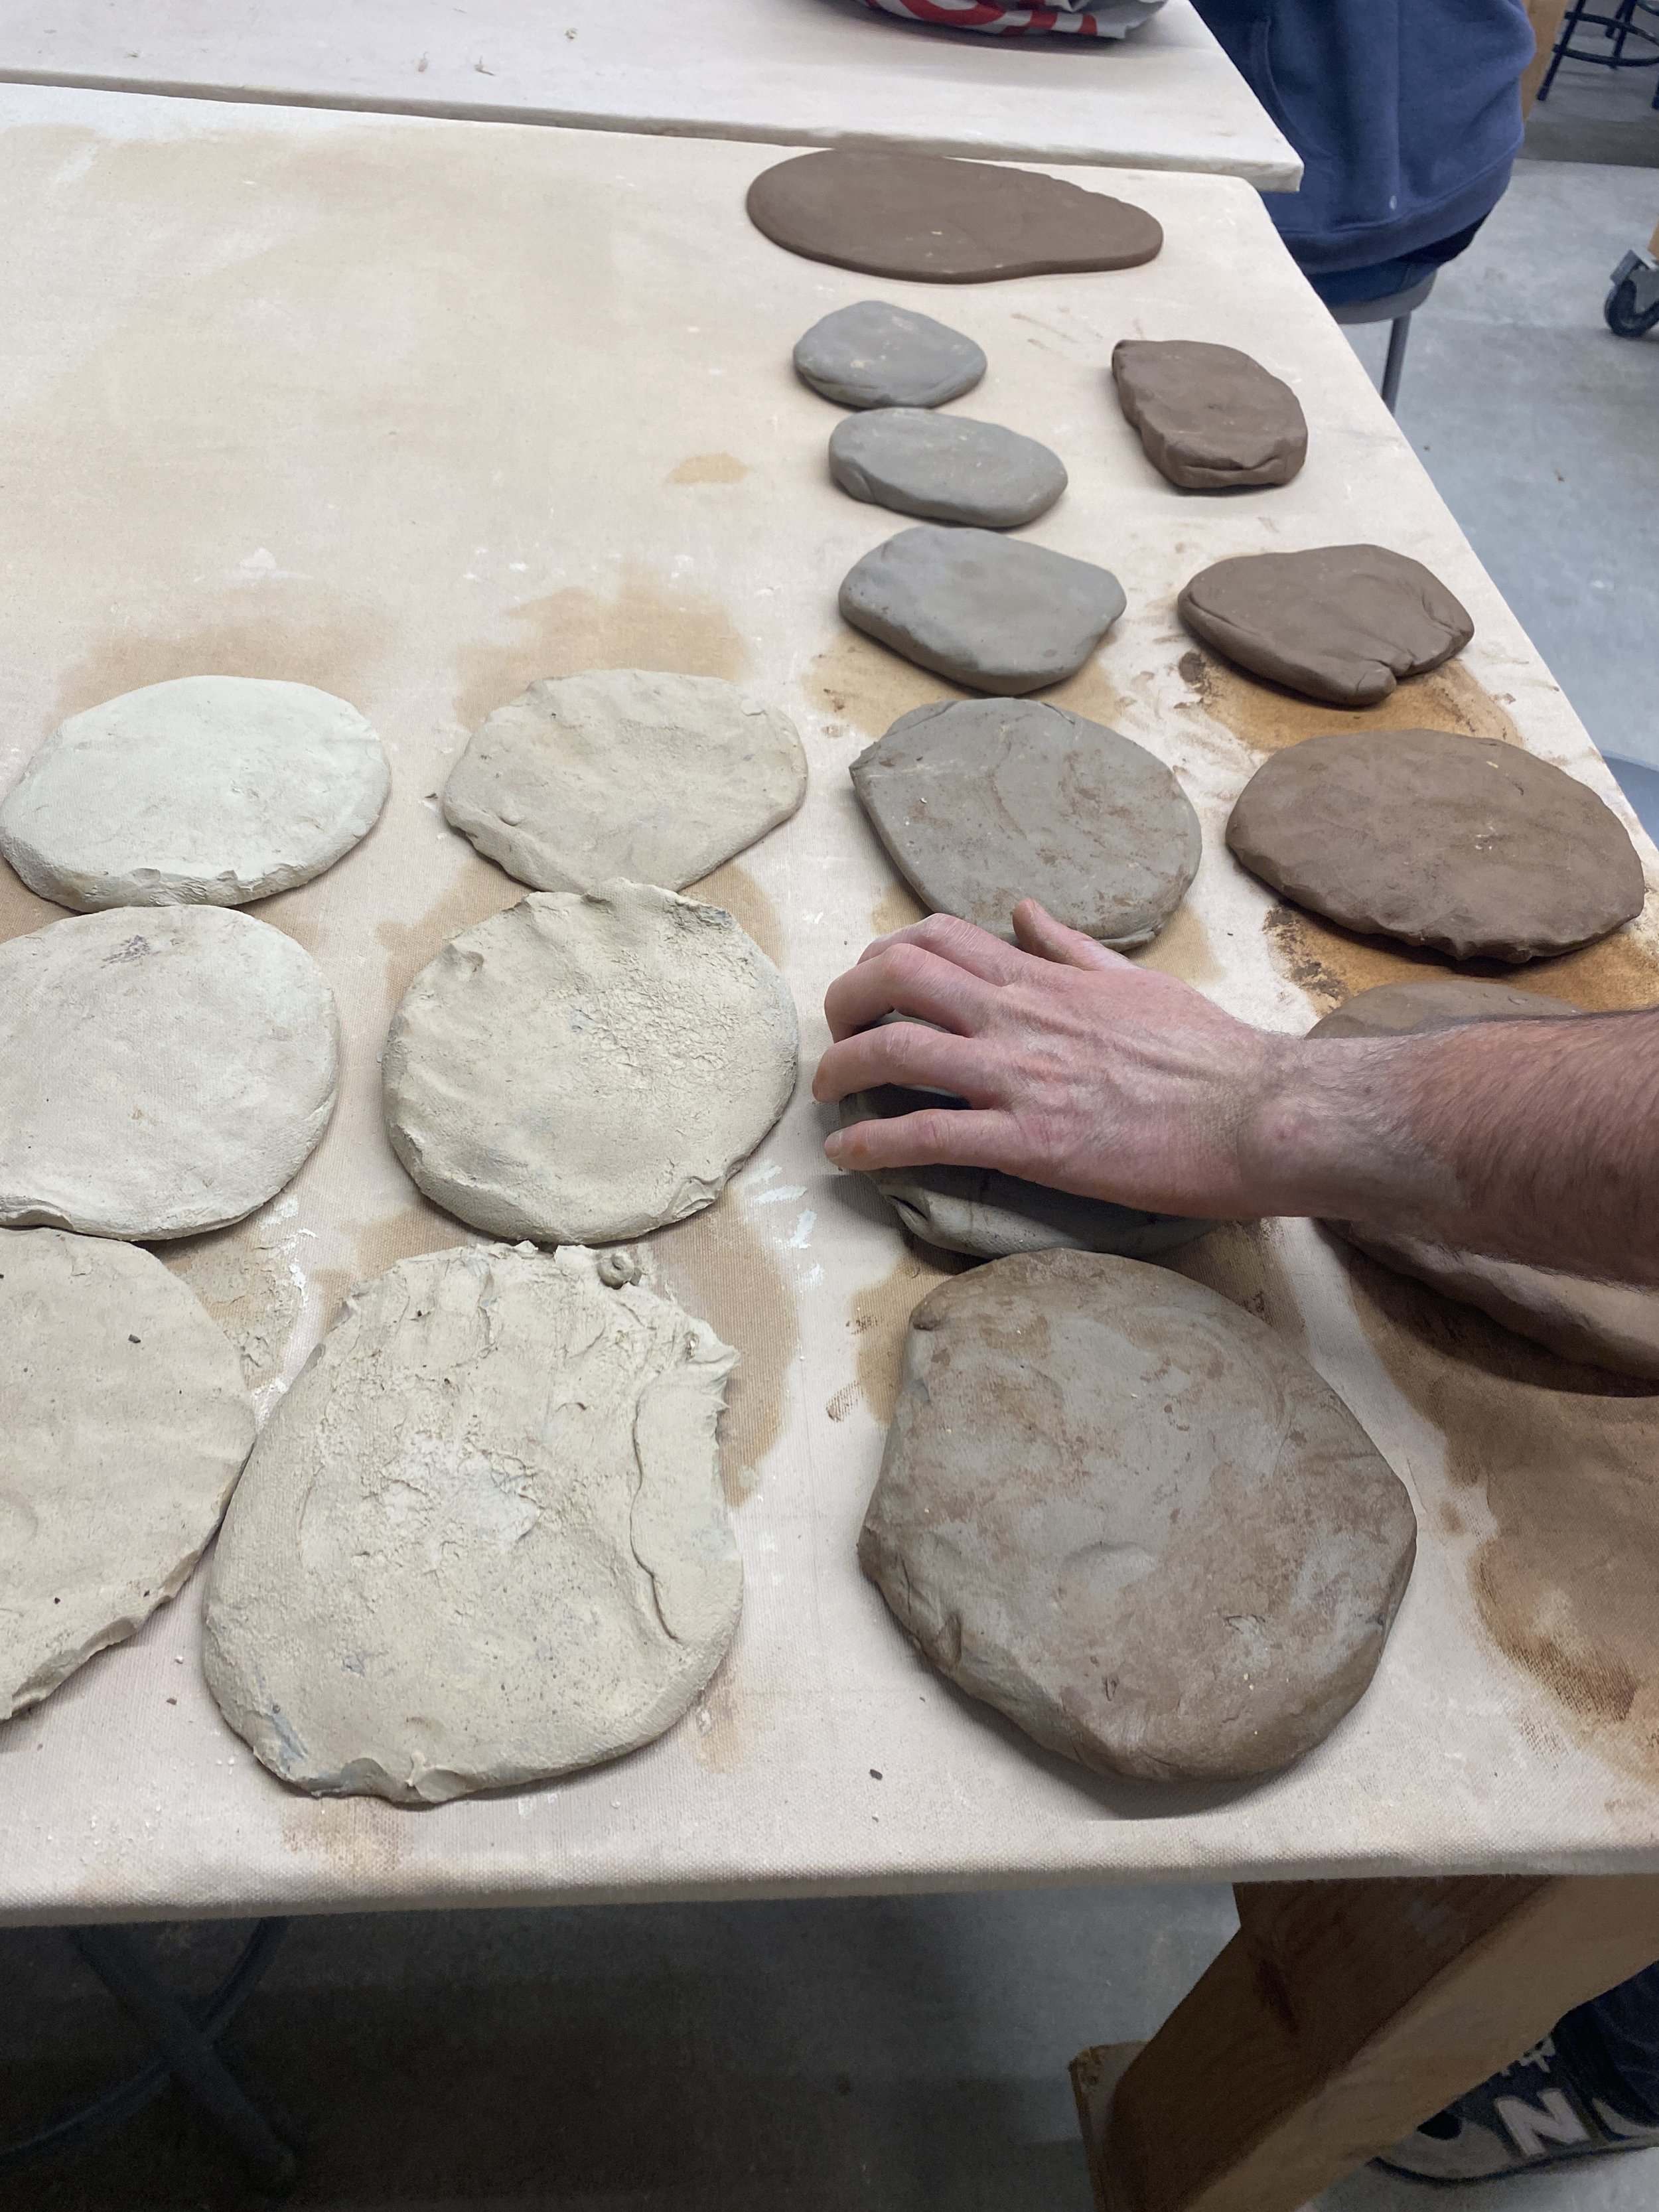
Sorting the Clay – I separated all my light, dark, and mid-tone clays into piles.
Measuring & Preparing – Weighed everything into equal-sized balls (mostly 1 lb each).
Rolling Slabs – Used a rolling pin with spacers to keep the thickness consistent (around ½ inch).
Slab Roller – Once they were uniform, I ran them through our slab roller.
Scoring & Slipping – Applied slip to the sides I wanted to layer (this is where the Nirikomi magic starts).
Layering – Experimented with different combinations:
2 colors (light & dark)
3 colors (light, mid-tone, dark)
2–6 stacked layers, compressing each time
Pattern Making:
Sliced and cubed layers for unique designs
Rolled layered slabs into a cinnamon roll shape for swirls
Created a checkerboard pattern
After layering, I let the slabs rest for a few days to allow the different clays to homogenize and prevent cracking.
These are all the slabs of different clay bodies I hand rolled

Once they were all layered I made different patterned blocks

I check the pattern by slicing a tiny bit off the top (this is the most satisfying part)
Phase 3: Letting the Clay Rest (Tips & Tricks)
Once all the layers are stuck together, patience is key. Some tips I got from experienced potters:
Wrap it completely in plastic—don’t let the clay touch the ware board to prevent uneven drying.
Keep it damp—spray it after two days to maintain moisture balance.
Minimal handling—dark clay stains lighter clay, so try not to touch it too much.
Avoid excessive water—too much blending can ruin the pattern’s crispness.
Repair cracks early—if splitting happens, carefully score, slip, and compress it while still damp.
Don't slab roll too thin—I found ½ inch is best; ¼ inch cracked too much during drying.

This is where I tile them all together and let them sit on a plastic covered bat
Phase 4: Handbuilding with Nirikomi Clay
After letting the slabs settle, I started shaping pieces. Since I’m not a pro handbuilder, I relied on asking around and watching YouTube videos to learn:
Bowl with a Mold – This was easy and helped preserve the pattern.
Pinch Pot – Didn't work as well (the pattern got distorted from too much handling).
Wheel-Thrown Hybrid – I tried a technique where you:
Build a cylinder on a form.
Place a centered clay base on the wheel.
Attach the cylinder and throw the rest of the form to smooth it out—this distorted the pattern slightly but gave it a clean look.

Videos That Inspired Me
Rather than droning on about technique, check out these videos—they’re way more visual and informative:
Final Thoughts: Just Experiment
Nirikomi can be super complex, but it can also be as simple as layering a few slabs and seeing what happens. If you’re into pottery, I hope this inspires you to experiment, recycle, and create something unique.
Happy potting!